
I hope you had as much fun last week as I. Now on to the next phase in this Leafy Quilt Sew Along.
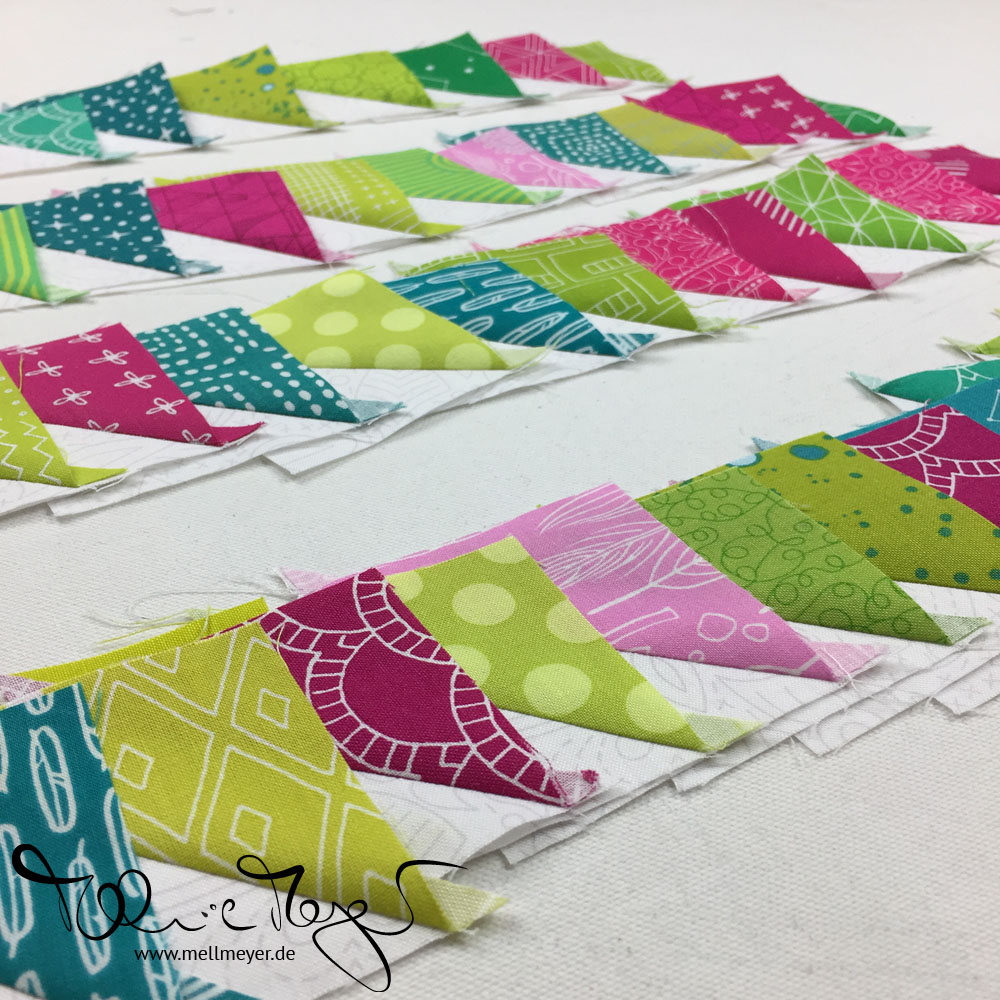
This week we will sew the first set of Full Blocks. We will sew Full Blocks for four weeks so one set is a quarter.
This blog post is fairly long: First we have my progress and me getting sidetracked about individuality in sewing systems. But then I added a lot more technical tips & tricks for diagonal seams and for pressing. Plus some pictures of what you all have been up to. At least I kept my progress pictures at a minimum… I will show you more eye candy next week with less rambling. Hope you make it to the end :)
Task
This week’s progress
To divide the Full Blocks into “sets” will give you an idea of how many to finish to have a consistent “sewing load”. But if you manage one more or less that is also fine. The number is supposed to be a rough bench mark. So if you already know that this week will be full of sewing time and next week not so much because you will be busy… or the other way around, feel free to move ahead or plan to catch-up the next week.
Though if there are no special things on your plate, I would advise to not finish all the blocks as fast as you can… otherwise we will still be having sewing fun and you just watch from the side lines :)
Tips & Tricks: Figure out what works for you!
This is so simple but important. Cause we are all different, we prefer different things and thus might need different systems when piecing our blocks.
On an older project I figured out, that for me it doesn’t work to sew “just” one block and then move to the next. Jumping up between sewing, pressing, cutting and again… it just doesn’t make me happy.
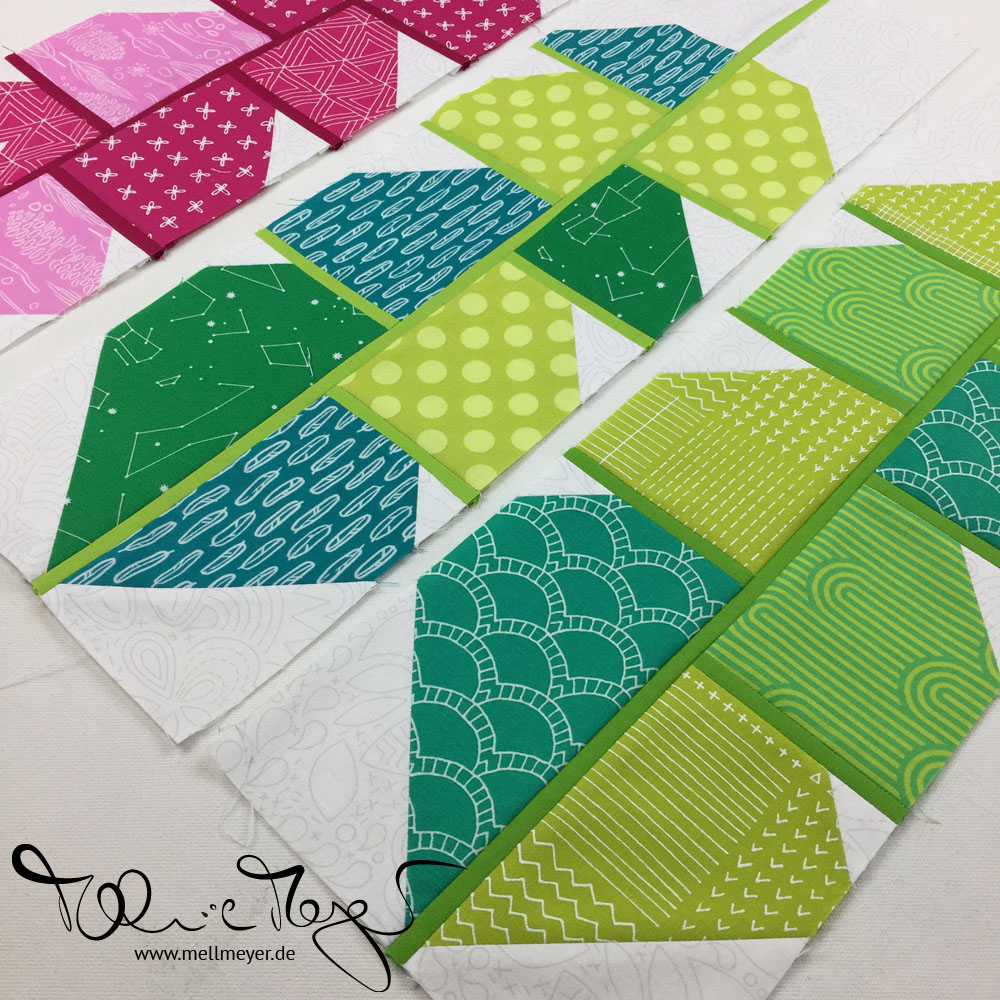
So in general I try to chain piece: I finish the first seam for a few blocks. Move to pressing and if necessary cutting and then add the next piece and so on. I tried this with my first leaves and it was driving me crazy even though I had my pieces for each block laid out on one sheet of paper. The paper is my cheap project board so I do not mess them up and am able to stack them.
For this block it worked better to do all the same tasks of one block at the same time. So I did all the snowballed corners/diagonal seams (pressed, trimmed). Then added the small stems (pressed, trimmed). After a few blocks I found a way that worked best for me because it kept the pieces “stacked” in order and I had just one chain. I have “a few” blocks left, so if I can figure out a way to do a time-lapse video, I will post that :)
But what works for me, might not work for you. Maybe you can press and trim without getting up. Maybe working on one block as that “quick” finish after work and then moving to the couch to do another one the next day is your cup of tea.
Try to switch things around till you find your way:)
Happy sewing!
And some more “technical” helpers:
Tips & Tricks: Sewing the diagonal with a tape guide
Sometimes I feel like things just pop up when you need them. Call it fate, god, luck, coincidence … but whatever you call it, I am always delighted. I had it recently with the quilt design for my bee quilt and now with a tip/tool for sewing diagonal seams without marking.
The trick is to use painters tape as a guide. And although I was skeptical, it does work with the big pieces but also with the smallest!
Cluck Cluck Sew just posted about a special tape she designed. Her explanation page is awesome and the tape sold out really fast. It is on reorder, so if it arrives soon and you are in the US, you might want to try it. I can’t try it because there is no shipping to Germany :)
So I went with the old fashion version; with normal painters tape. She also had a blog post in 2010 about that. A similar post can be found at AlliKat Quilts. Including the instructions to add another line if you want to prep for an HST of that cut-off part.
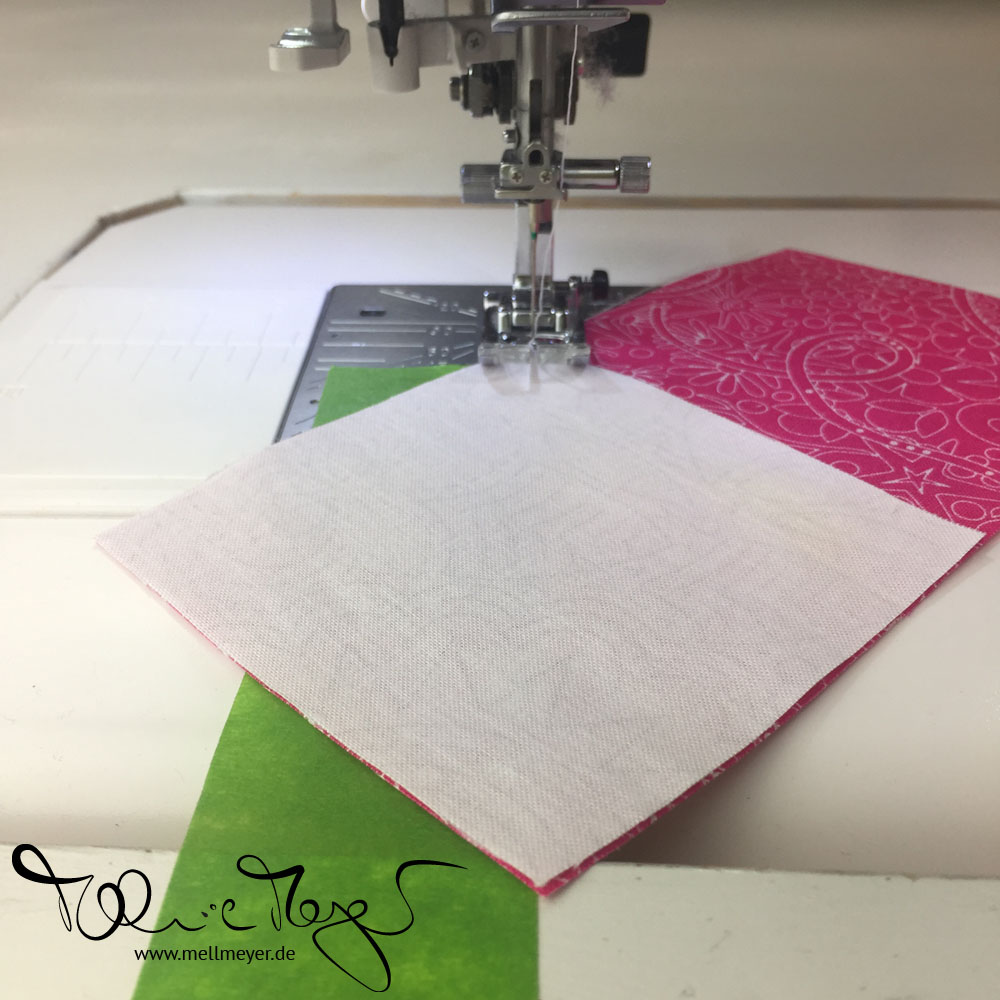
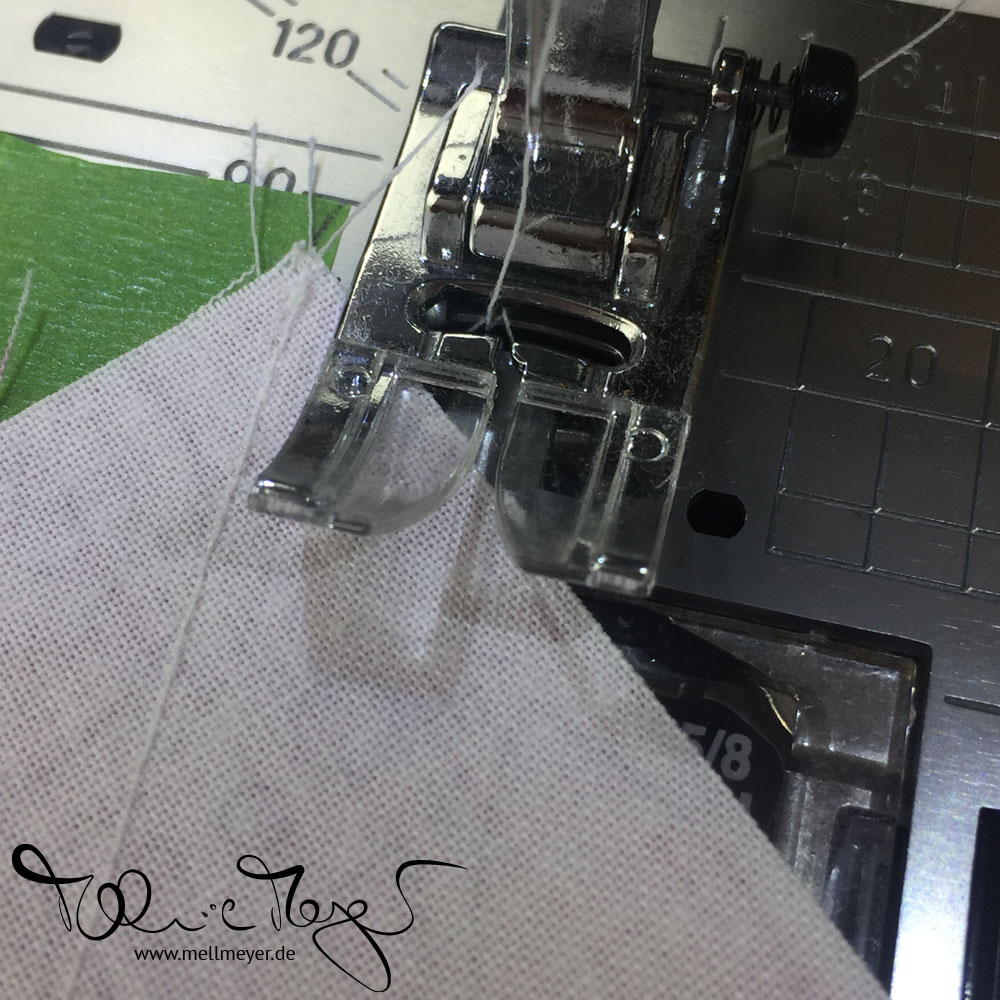
You align the top point of the diagonal/square with your needle and then keep your bottom point of the diagonal/square on the edge of the painters tape. Start slow but it is really easy!
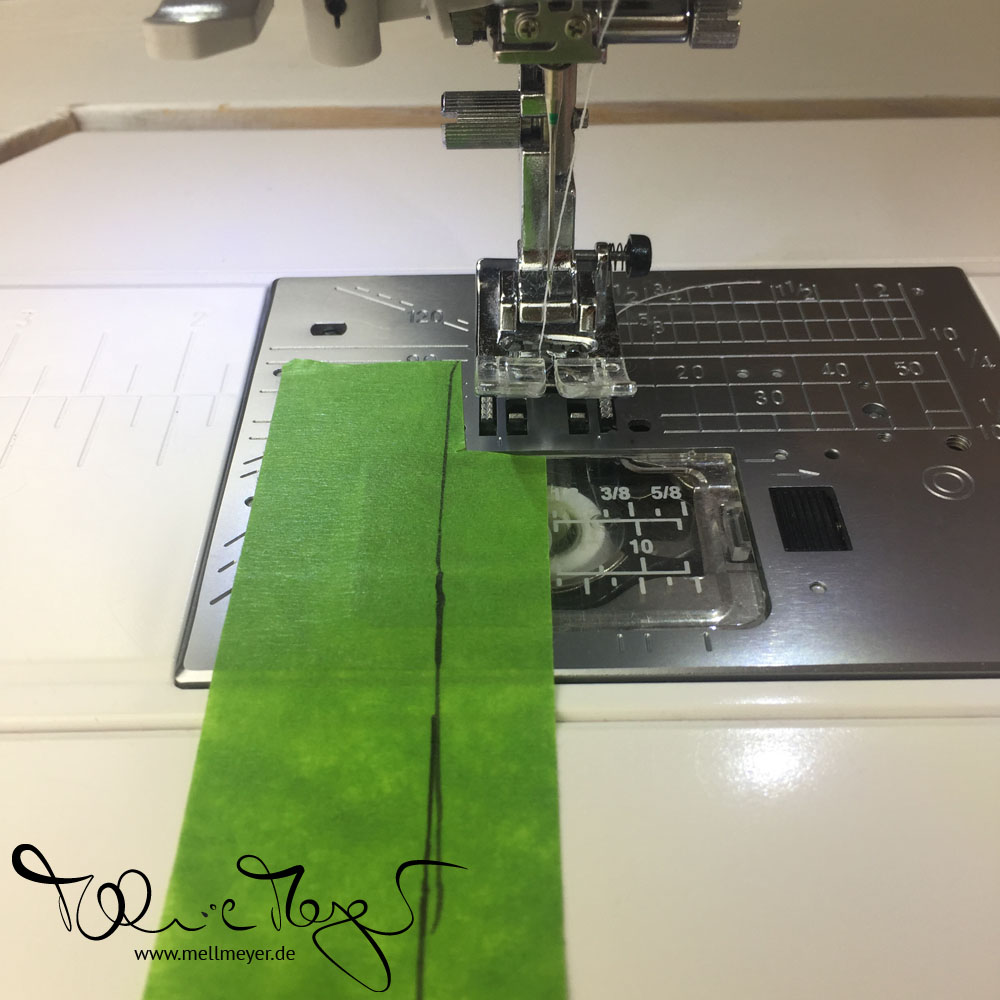
I combined the idea of AlliKats instructions with Cluck Cluc Sew’s printed lines. I just drew mine – a bit wobbly I might add. For that, the line and thus the tape need to extend past the start of the feed dogs and should go at least to the end of your sewing foot.
Mine is too short. The needle is not yet touching the fabric but I have no line anymore to align my seam to. So make yours longer :)
Cut out the part that covers the feed dogs!
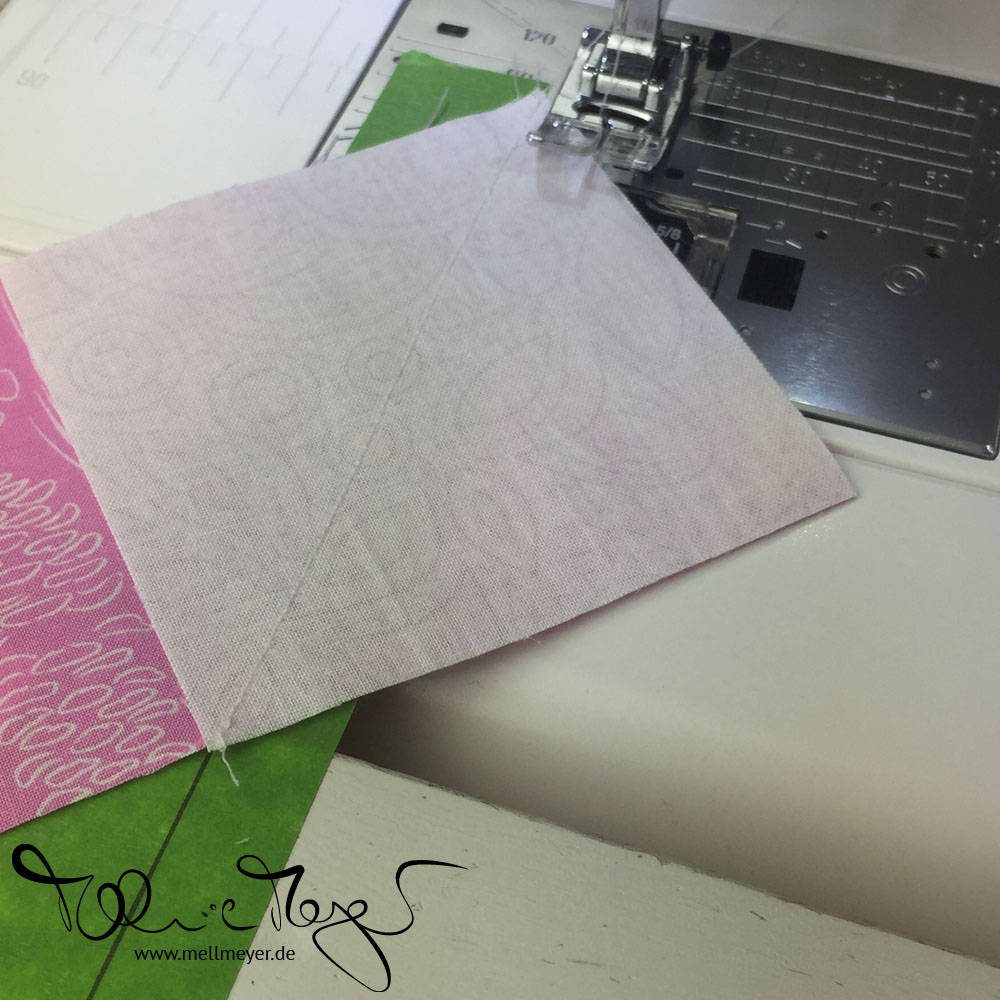
This way you can align your just sewn normal, diagonal seam with your half inch line, the top point on the line besides your foot the bottom point just as with the normal version on the line. And sew the second one for the HSTS. You then just cut as you normally would, a quarter inch away from the first line – which is now in the middle of both seams. And celebrate, you already have the extra HST finished.
Of course you can only add an additional line to pieces that are big enough. For Leafy I use it with the K & M pieces. This way I don’t feel sad about throwing a “large” triangle away and it is easy enough to later sew something nice with the HSTs. I figure I will be able to trim them down to 2.0 inches maybe even 2.25 inches unfinished… Plenty of options of that size.
I already used the second-line concept – with normal drawing – on my ghost quilt. The tiny HSTs went into small zipper pouches :)
Tips & Tricks: Pressing
Set your seams!
When you sew your two pieces together, there is tension on the thread and the fabrics builds a bit of loft besides your thread. To counter that, simply but your iron on your just sewn seam. Don’t iron aka move it just simply lift it up, put it on the seam for a second and lift it up for the next piece.
It will take the unnecessary tension away, make uneven stitches look more even and press away the loft. The thread sinks/sets into your fabric. It makes your seam lie really flat. Only after that press to the side or open.
Use a wooden board
Another tip I love is to let tricky seams or the finished block cool of under a weight. When I read that tip, someone recommended a magazine. I had an unwanted, magazine like book – a softcover the size of a magazine with just a bit more pages and thus weight. It worked but after a very short while the book became wobbly, as all papers do when coming in contact with water. The steam I was using to press, destroyed my book. No harm because it was going out my apartment anyway but I needed a better concept.
So I switched to a fairly heavy wooden cutting board – never used in the kitchen of course! The wood is not affected by the water and if you think it soaked up a bit too much of the moisture, just leave it upright like on a drying rack for the night/day and only then put it away.
The main trick is to have a weight on the block while it cools! So leave the wooden board on there till the block fully cooled off. Do not just put the weight on there for a second but at least a few minutes :)
Community
My Instagram Highlights
I thought it would be nice to share highlights of what the group has been up to. Nonetheless be sure you follow the hashtag #leafyquiltsewalong on Instagram. Look around, like and comment!
Here are some more fabrics pulls:
And look how organized you all are!
Sponsor
Fat Quarter Shop
Also I want to give a shout out to our sponsors. They are the ones that make the prizes for you at the end of the Sew Along possible. This week’s short profile:

The main person behind it is Kimberly Jolly. She writes “The Jolly Jabber Quilting Blog” and is very active on Instagram and has her own You Tube channel Lights Camera Quilt. Besides patterns there are what feels like gazillion tutorials. E.g. I once pinned her “On Point Setting Guide” pdf | video to have it handy whenever I need it :)
You made it to the end! Now hop over to your sewing station and start on your Full Blocks. Found a fun sewing system that works for you? Please leave a comment so we can all be happy with you and maybe copy you shamelessly.
Remember to post your progress with the hashtag #leafyquiltsewalong. And tag me @mellmeyer if you want to.
Have you signed up for the newsletter yet? No? Do it now, that way you can’t miss any new posts and information.
See you next week!
Best wishes
xo Melanie


Thanks for the tricks with the diagonal seams. I will try this!
And the HST sewing within the set also seems quite good!
My way is sewing 3 leafes in a set. (Depending on table place)
I sew the snowballs and the stems in a “dobblechain”.
Means pinning 2 pieces and sewing 2 chains and iron once.
That’s how it works the best way for me.
I enjoy this sew along a lot!
Your leaves are supremely gorgeous!!! I wish I was a butterfly on your pretty pink and lime leaves :-)
You know that shipping to Germany can be arranged :-)
For flat (or flatter) seams, I have found that a wool ironing mat is helpful. I also use a ruler (in place of a magazine or a chopping board) just because it is a flat surface handy :-)
Hugs to you!!!